Imagine this: it’s a bustling Monday morning, and you’re just about to finalize an important project on your MacBook Pro.
Suddenly, the screen goes black — panic sets in as you frantically try to revive it, only to realize that all your vital data might be lost forever.
This nightmare scenario is not as rare as you might think.
Without a reliable backup strategy, everything from precious family photos to critical work documents can vanish in an instant. In our increasingly digital world, knowing how to back up a MacBook Pro isn’t just a technical skill; it’s essential self-preservation.
The good news?
Safeguarding your valuable information doesn’t have to be complicated or time-consuming.
Whether you’re a tech novice or a seasoned pro, there are straightforward methods available that will keep your data secure and easily retrievable.
From utilizing built-in macOS features like Time Machine to exploring third-party cloud solutions, this guide will walk you through the best practices for ensuring that no crash, theft, or unexpected mishap ever leaves you empty-handed again.
Dive in and discover how simple steps today can save you from major headaches tomorrow!
Table of Contents How to back up a MacBook Pro
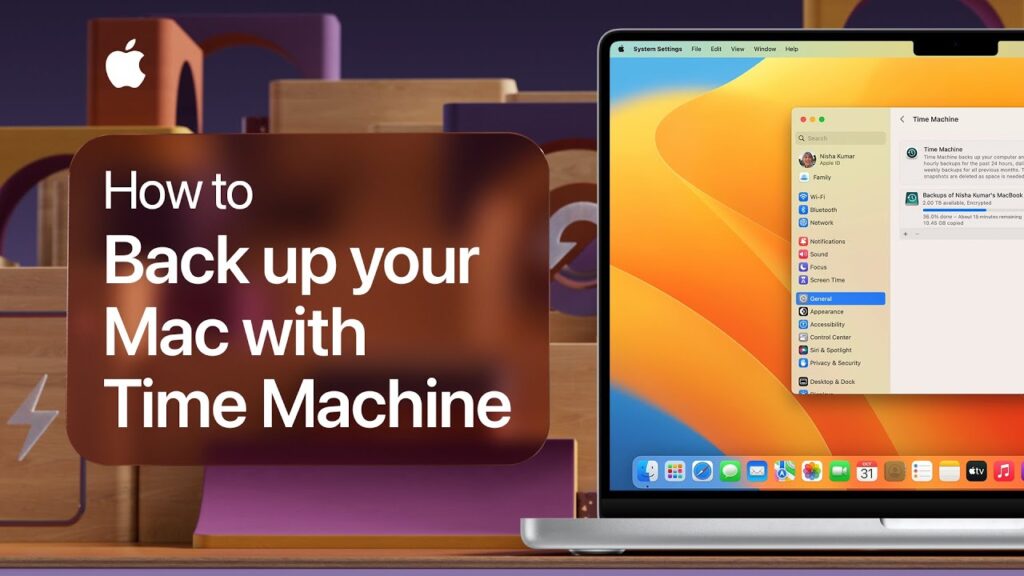
Backup a MacBook Pro with Time Machine
Time Machine is Apple’s way of automatically backing up everything you do on your computer. It works similarly to Windows Backup, except it backs up your entire hard drive every hour.
This makes sure that even if something goes wrong, you won’t lose anything important. You can set it up manually, or let it run automatically whenever you boot your Mac.
The most recent version of OS X includes a backup feature called iCloud Drive. If you enable this option, your backups are stored online rather than on your local machine.
However, there are some downsides to this method. For one thing, your data isn’t encrypted, meaning anyone could access it if they had your login credentials.
Also, if your internet connection fails, you won’ t be able to access your data. Finally, while you don’t have to pay for iCloud storage, you still have to pay $0.99 per month for each device you want to use it with.
If you already have a backup solution like Backblaze, Dropbox, Carbonite, CrashPlan, Mozy, or others, you might not need to worry about iCloud Drive. But if you’re looking for a free alternative, here are three options to consider:
Duplicati
The platform is a simple program that lets you choose what folders to back up. All you have to do is select the ones you want to include, and then hit the button to start duplicating your files.
You can add as many folders as you want, and you can exclude specific types of files. Once you’ve finished selecting your folders, just wait for Duplicati to finish copying over your files.
Vera Crypt
This tool is a free open source tool that encrypts your drives and allows you to easily mount them without needing to enter a password.
There are no limits to how much space you can store, and you can encrypt individual files or whole partitions.
Install VeraCrypt alongside Linux and plug in your external drive to use it easily.
Store files in iCloud
This is an internet access Drive that makes it easy to save and sync documents across multiple Apple devices. You can even open files stored online directly on your Mac.
Files are automatically backed up to iCloud, too, so you can always retrieve them later.
You can use iCloud Drive to store and manage files like photos, videos, presentations, spreadsheets, PDFs, and music. And since everything stays in one place, you can easily find what you’re looking for.
To help keep things organized, you can tag items and add notes to make sure everything gets where you want it to go. If you ever lose something important, just ask Siri to help you recover it, and she’ll do her best to help.
If you want to restore your Mac from a backup, follow these steps.
Your Mac might crash without warning. You could lose everything you worked on since the last time you backed up. If you don’t know how to recover lost data, here’s what to do.
Create a Time Machine Backup
Time Machine lets you automatically back up your computer every day. This way, you’ll always have access to previous versions of your documents, photos, videos, and other important information. To set it up, connect your Mac to your network, launch System Preferences, open the Apple menu, select “Time Capsule,” and follow the instructions.
Back Up Your Files Manually
If you’re worried about losing work because of a system failure, you can manually back up your files. Here’s how:
1. Click the Start button and then click Control Panel. In Windows 8, press +X.
2. From the list that appears, select System and Security.
3. On the left side of the window, under Backup and Restore, click Back Up Now (see Figure 4-6).
4. Select the type of file you want to back up. For example, if you only want to back up your Documents folder, select Documents.
5. Choose an option to create a new backup or restore a previous version.
6. Click OK when you’ve selected all the options you want.
7. When the backup completes, click Restart now to restart your computer.
8. After your computer restarts, log into your account and check your email. You should receive a message with a link to download your backup.
9. Open the downloaded zip archive and extract its contents. The files will be saved in the same location as your original files.
10. Delete any old backups you don’t need anymore.
11. Use the files to restore your Mac.
Figure 4-6: Back up your files by selecting the types of files you want to include.
12. Connect your Mac to your network.
13. 14. Choose the date and time you want to start backing up your files.
15. Click Continue.
16. Follow the prompts to complete the process.
17. Once the backup is finished, disconnect your Mac from the network.
18. Log out of your account and delete the backup files.
19. Disconnect your Mac from your network again.
20. Turn off your Mac.
21. Remove the battery and wait at least 10 minutes before reinserting it.
22. Plug your Mac back into your network.
23. Launch System Preferences and choose Time Machine.
24. Click the Start button.
25. Select the date and time you created the backup.
26. Click Continue.
27. Follow the prompts to finish restoring your Mac.
28. Log into your account and check for messages.
29. Download any missing files from iCloud.
30. Enjoy your restored Mac!
Prepare your Mac for service
Before you go into Apple Store Genius Bar for service, make sure everything is ready for the technician. Follow these steps to ensure your Mac starts up quickly and smoothly.
1. Make sure your battery is fully charged. If it isn’t, plug in the AC adapter and charge it overnight.
2. Remove any stickers or labels from your computer case and power supply unit. This will help the technician see what he needs to fix.
3. Take out the hard drives and connect them to another computer. You don’t want to damage your data while the technician works.
4. Turn off Wi-Fi, Bluetooth, AirPort, and Energy Saver settings. These are unnecessary distractions that could slow down the repair process.
5. Run Disk Utility and verify your disk health. If there are errors, run Repair Permissions.
6. Restart your Mac.
Check your storage capacity
Macs are great computers, but you don’t want to run out of space. You can check how much free disk space you have on your computer by opening Disk Utility.
From there, select the name of your hard drive, and choose “Info.” This will show you what type of file system it uses, and how much space you’ve got left.
If you’re running low on storage space, you might consider upgrading to a bigger hard drive.
Free up space on your Mac
Macs are great at storing data, but most people don’t realize how much room there is on their hard drives. In fact, you might find yourself running out of space even though you’re still getting plenty of free storage thanks to Apple’s cloud services. Here’s how to use those resources wisely.
The first thing that comes to mind when we think about our Macs’ storage capacity is the amount of stuff we’ve downloaded and installed over time. We’ve all got a ton of apps, music, movies, photos, documents, and other files sitting around in our computers right now.
But what if you could get rid of some of it?
What if you could just let it all go?
That’s exactly what happens when you download an app from the App Store.
It gets stored somewhere else—in the cloud. And because it’s not really on your computer anymore, you won’t be able to access it unless you log in with your Apple ID.
So why keep it? Delete it.
You can also remove old versions of apps from your Mac. Just open Finder (the icon looks like a folder) and click Applications. Then drag an app onto the trash bin. It’ll disappear forever.
You can do this with any app that has been removed from your computer. So if you no longer need an app, delete it.
If you’re worried about losing something important, back it up before deleting it.
Now every time you save a document or change a setting, it automatically backs it up to iCloud.
When you sign in to iCloud, you can view your backups online. Click View All Devices to see all the backups available.
You can also restore individual items from your backup. Open Finder again and navigate to where you saved the item. Drag it into the Trash.
You can also create new backups manually. This will start backing up everything on your Mac. When it finishes, you’ll be prompted to enter your password. Enter it, then click OK.
Your backup should appear in the list of devices in iCloud. Select it, then click Restore.
Your backed-up items will reappear on your Mac.
Erase or format a storage device
Disk Utility is Apple’s tool for formatting and erasing hard drives, solid state drives, flash memory cards, USB sticks and external enclosures.
With it, you can easily wipe out data on a disk or partition, format a volume, repair permissions, and perform other tasks.
You can use Disk Utility to manage multiple volumes simultaneously, including SSDs or RAID arrays.
The utility can also help you troubleshoot issues such as slow performance or corrupted files.
If your Mac is slow to start or open apps, you can try using Disk Utility to fix issues like incorrect permissions or damaged file systems.
If you see errors during startup, run Disk Utility to check for corrupt partitions or recover deleted files.
To access Disk Utility, launch the Utilities application on macOS 10.12 Sierra or later versions.